


Graham Oppenheimer, Senior Chamber Music and Viola tutor at Chetham’s School of Music, gives a step-by-step guide to recording chamber music remotely
What you will need
- Headphones that are laptop compatible (you will only use right ear).
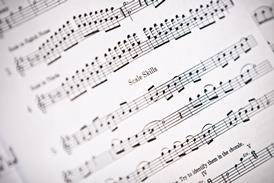
- Individual parts of your chosen piece, as well as a score.
- Video recording device (phone, tablet or camera)
- Laptop (Mac and Windows both support this programme, although if you have a Mac system lower than Mac OS X 10.13.6 you will need to download an earlier version of DaVinci).
- A stand to hold your recording device
- DaVinci Resolve 16 downloaded (search DaVinci Resolve download and download directly from the Blackmagic Design website).
- Access to a file sharing platform of your choice. Google Drive, OneDrive, WeTransfer and Dropbox are all good, it is down to personal preference.
Set up and recording
- Place your recording device on your stand in landscape position.
- Ensure that it is at least a metre away from where you will stand/sit to record. This will ensure that your whole torso will be visible in the frame, allowing other participants to follow your visual cues.
- Practise your part with a metronome. Recording rhythmically complex passages is very difficult with this method, so you need to make sure you are totally in time, especially if you are the first to record.
- Place your laptop in a visible location, ideally somewhere close to the music.
- Plug in your headphones, and place in your right ear. This leaves your left ear free to hear your own sound.
- Start your video recording, and then press play on the layered video.
- Count out loud “1,2,3,4 (clap)”. The assembler can then perfectly line up recordings.
- Record your part all the way through, listening carefully to the video.
- Listen back and re-record if necessary.
Read Graham Oppenheimer’s accompanying blog about his own experience of Running an Educational Chamber Music Programme Remotely
Assembling your project in DaVinci Resolve 16
- Open DaVinci Resolve 16.
- Upload videos into Media Pool. Right click in the media pool, then ‘import media’ and select from your files or if you are using a Mac, drag the videos into the Media Pool.
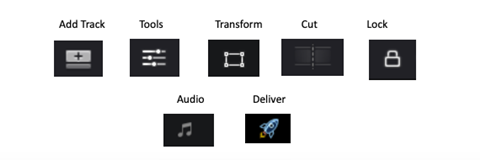
- Drag these files individually into the main box. You should create a different ‘track’ for all of them by clicking the ‘add track’ button on the left of the main box.
- Create your grid. First click the ‘tools’ button, where you will then be able to find the ‘transform’ button. Use this feature to resize and organise your different clips. (command-z is the shortcut for undo).
- Synchronise your different clips. Start with your ‘master clip’, and synchronise them in the order they were recorded. You can do this by clicking on the clip you want to move, and dragging it forwards and backwards. If you want to trim your clip, use the ‘cut’ button found about the main work station. Once you are happy, press the lock key next to the track. This will lock it in place.
- Adjust the balance. Click on the audio icon along the bottom of your screen, which will take you to a new page. Click ‘mixers’ in the top right hand corner, then adjust the volume of each of your files by sliding the control up and down.
- You are now ready to complete your project! You should have a ‘quick export’ button in the top corner. Click this, and choose which platform you would like to export it to. Choosing H.264 or H.265 will upload it as a .mp4 or .mov file to your computer.
- If you do not have a quick export option, click the deliver icon in the bottom right hand corner. This will take you to a new layout. Select the download option in the top left (youtube. etc), click ‘Add to Render Queue’ and then click ‘Start Render’.
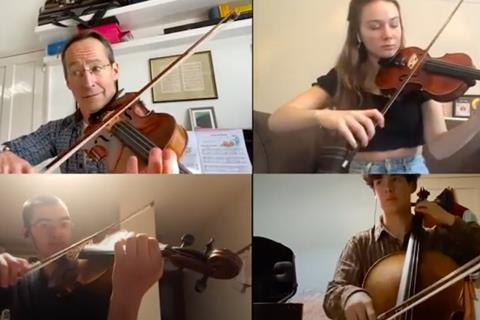
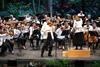
See below for a video of Visiting Artist Richard Milone playing the Canzonetta from Mendelssohn’s Quartet Op. 12 with Chetham’s students


1 Readers' comment