


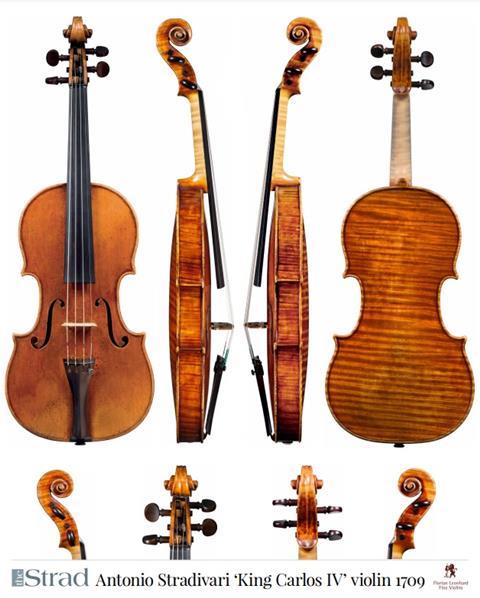
In his search for the secrets behind the classic arching technique of the Cremonese makers, Torbjörn Zethelius uncovered some revealing insights in this article from The Strad August 2006 issue. He will be returning to the topic in the November 2017 issue with observations from the intervening decade
Why do classic Cremonese arches have such flair? Were the Cremonese violin makers superheroes? Probably not. It’s more likely that the arches have flair because of the work process common to all the makers. The violin making tradition of Cremona was handed down from Andrea Amati: a centre hole in the back of most Cremonese violins from the classic period indicates that he invented a system of instrument making that benefited later generations of violin makers.
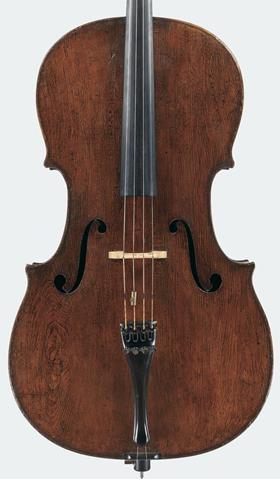
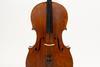
This system, and many of its techniques, has since been lost. As a relatively fresh graduate of the Violin Making School of America (VMSA) in Salt Lake City, Utah, and armed with tools, templates and plaster casts, I attempted to reproduce the arches of a 1736 Giuseppe Guarneri ‘del Gesù’ violin. You might think it would be a straightforward task, but although classic Cremonese arches give the impression of being very simple, they are not easy to recreate. After trying a few times and failing, I realised that I would need to think hard in order to find a simpler process. I’m sure many violin makers would agree when I talk about the agonies of the arching process. The difficulty lies in making it look simple and natural, as in the classic Cremonese style.
RECREATING CREMONESE ARCHING
My criteria for recreating the classical Cremonese arching technique were therefore as follows:
- It should be simple: the arch looks simple, and it should be just as simple to achieve.
- It should be quick: despite the apparent swiftness and carelessness in later ‘del Gesù’ violins, there is no sign of sloppiness in the execution of the arches.
- It should be possible to vary the arches while maintaining the Cremonese flavour. It’s clear that the old violin makers were not copying a master arch: there is plenty of variation in classic Cremonese arches.
- It should fit in with current knowledge of classic lutherie techniques.
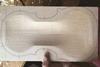
THE ANATOMY OF THE ARCH
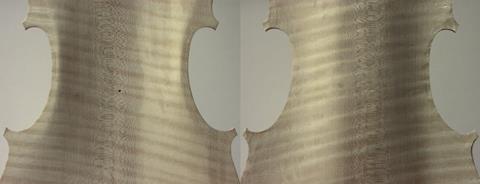
First I needed to try to make the arch easier to understand. As I’ve already mentioned, contrary to its apparent simplicity, the arch is quite complex. In this context, the violin plate consists principally of three elements: the arch, the recurve and the edge crest. The manner in which these were executed and the way they flow together determines whether or not the arch in question is in the Cremonese style.
Then it dawned on me that the inside of the plate is much simpler than the outside, in that it lacks both the recurve and the edge crest. There is just the dip, which levels out towards the ribs and blocks. It was a revelation: the arch becomes a simple thing when contemplated from the inside.
As a student at the VMSA, I attended a lecture in which the director, Peter Prier, said in passing: ‘Some people think that the old Cremonese masters made the inside first.’ My immediate thought was: ‘That’s stupid; it’s the outside that counts.’ Now I realise that I’d simply programmed myself to think this way.
It became clear that I’d need to consider the inside, and find a working system from there. Through a series of trials and errors that consisted mainly of trying to find a satisfying way of hollowing out the long arch, I have now arrived at a method.
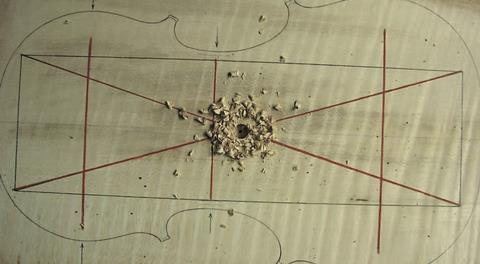
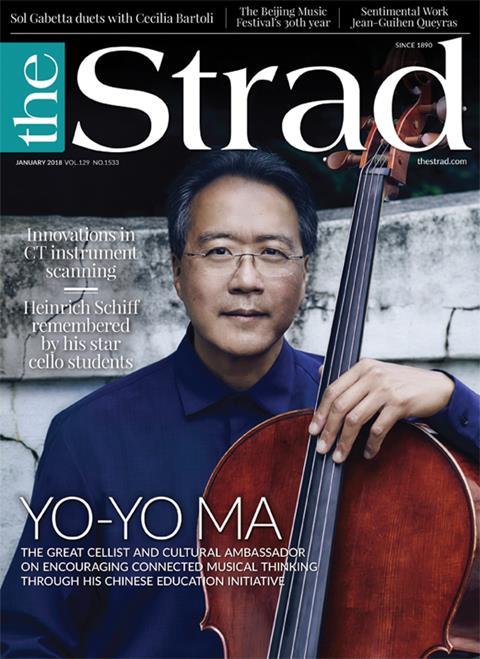
THE HOLE IN THE CENTRE OF THE BACK
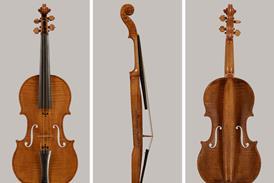
The deepest point of the inside of a typical Cremonese back arch is located in the centre, which is also where the famous centre hole can be found. Some people call it a pin, though the pins may not
be original; I call it a hole because it isn’t always plugged. The hole is conical, and its diameter is about 2mm at its widest point. It enters the back from the inside, and ends on the outside in
a barely visible point. In a few instances there is just a mark inside the arch where one would expect the hole to be found.
Centre holes are found in all violins made by the Amatis, as well as in those by Andrea Guarneri. They also figure in Guarneri ‘del Gesù’ violins, though in these they are located slightly above the centre. Unless the back has been regraduated, the hole is always located in the thickest point.
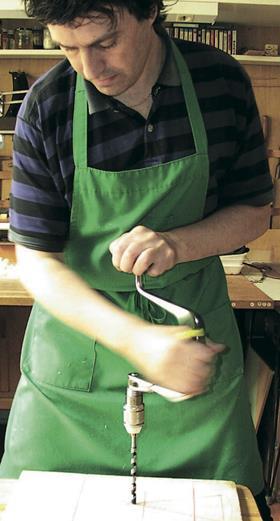
DRILLING HOLES
I worked out that to make the arch from the inside, I would have to establish the deepest point to use as a landmark for the gouge. The obvious way to do this is to drill a hole to this depth.
I could clearly see the relationship between the Cremonese centre hole and my own. I could also see how practical it would be to have a twist drill with a point the length of the thickness of the back:
if I were to plane the outside of the back down to the finished arch height and then lay it face down on a hard surface, I could drill straight through from the inside and establish both the thickness of the back and the depth of the inside arch.
Cremonese bellies, however, are different. They don’t have a hole in the centre, because they’re made of a softer wood, spruce, which is much quicker to carve. Roughly hollowing the belly to the right depth usually takes just a few minutes.
If the belly is drilled like the back, using a drill with a lead point, the point would be less than 3mm long. Working quickly would be detrimental and not very practical. It is better to drill to the bottom of the arch, leave extra wood on the outside and then use a thicknessing spike to find the final thickness and arch height. Thus I have two different drills for the belly and the back.
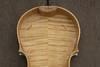
THE CATENARY CURVE
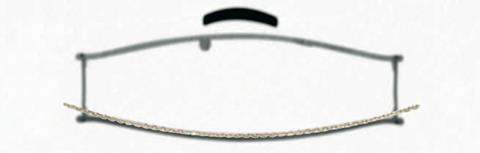
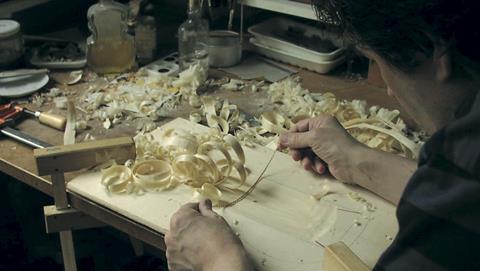
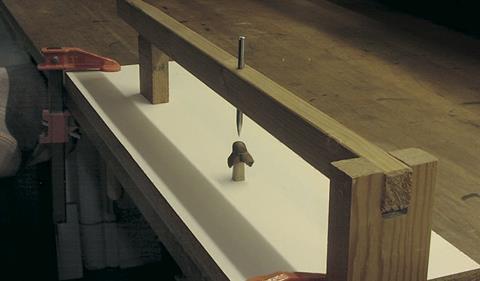
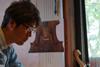
When I first began hollowing out arches from the inside, all I needed to guide the gouge was the shadow from a straight edge laid across the plate. As I had a clear image in my mind of what I wanted to achieve, this was enough. However, during an email exchange with an alumnus of the ‘inside’ system, Rick Stewart of Washington, DC, I realised that it wasn’t so clear to everybody what the curve should be like. Together we came up with the idea of using a chain to create the curve (see left). Given that the chain is even, it will always form the same mathematical curve – called a catenary – regardless of how loosely you hold it between your fingers. So all you need to know is the length and depth of the cavity that you are about to excavate. The chain method is a very flexible system: it creates a perfect curve derived from nature in the simplest way.
The catenary curve takes its name from the Latin word catena, meaning ‘chain’. If this rings a bell, it’s probably because catena is also the Italian name for ‘bass-bar’, and it’s a term that has been in use since the earliest days of violin making. When I initially began thinking about the inside arch, it naturally occurred to me that the arch can be regarded as imitating a string in motion. I was not far off: a vibrating string actually forms a catenary curve.
THE LONG ARCH
The reverse order in which I now work has made me look at the violin with a new perspective, and given me new insight into the violin’s acoustic workings. The way I was originally taught – to work from the outside, which is the prevailing system for modern makers – automatically leads the brain to emphasise the significance of the plate’s outside arch, together with its various thicknesses.
This new method of starting with the inside arch led me to consider the architecture of the ‘room’ inside the violin. I came to realise that the inside shape of the plates, together with the ribs, directly shapes the resonating body of air inside the violin. From this new perspective, I’ve realised that the inside of the violin shouldn’t be randomly affected by the graduations being given to the plates, but must in itself be regarded as an acoustically designed space. This awareness influences my whole work process, and the difference is profound. The inside arch is in fact very simple – it consists, more or less, of just the long arch.
This gave me a new idea about how the acoustics are governed by the inside arches of the violin: the violin’s inside arches create a tube of air, which is fundamental to the sounds produced. The tube is similar to the pillar of air inside an organ pipe. It is needed to create sound, and its shape, in combination with everything else, determines the quality of sound – even more so than the outside arch. This is the philosophy that governs my thinking today.
THE EFFECT OF CREEP
Creep is the deformation that occurs at stress levels below the breaking point of the wood. The amount of deformation depends on the wood’s individual resistance; each piece is different. Because of the constant tension from the strings, all violins experience creep over time. The main result is a tendency for the belly to rise, which is why most new violins will need a longer soundpost after a few months. However, because the bridge counteracts the rising of the arch in the centre area to some extent, the ends may rise more in comparison, in effect making the arch flatter. In the back, the creep occurs mostly in the soundpost area, because the soundpost pushes it out, while the bass side sinks in. This could be why the bellies on old instruments can be quite flat.
Once I realised that I needed to look at the arch from the inside out, the creative process quickly fell into place. It’s interesting that the way we use our tools influences our way of thinking.
The connection between the Cremonese centre hole and my drilling system seems evident from the way I carve the arch. They share the same placement, and the end result is the same: a classic Cremonese-style arch that is easy to create.
Photos ©Torbjörn Zethelius except where otherwise indicated


No comments yet