


We asked some top makers and restorers to share their favourite labour-saving devices, and got a fascinatingly broad range of responses
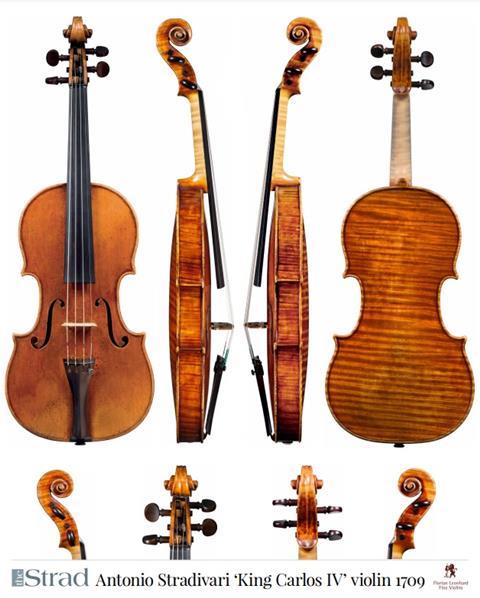
FLORIAN LEONHARD
www.florianleonhard.com
Gadget choice:Microtex DiscoveryCam from €900
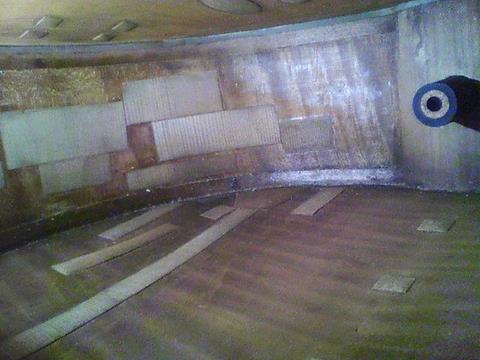
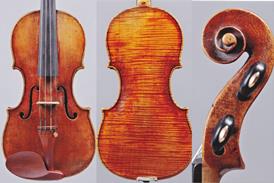
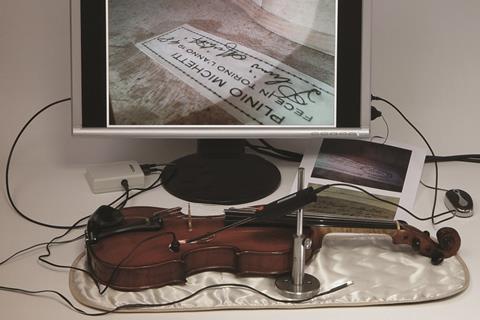
Looking inside an instrument is something I have to do every day. Finding out how the maker carried out the interior work is often key to authentication: how the linings were inserted into the corner-blocks, for instance. So being able to see inside in a crystal-clear way is a necessity. Many people just used a bright light and put a mirror through one of the f-holes; for a long time I used a specially adapted stethoscope, which was less than satisfactory – not only was it expensive but I had no way of taking a picture of what I could see, and also needed two hands to operate it.
I’ve been using the DiscoveryCam for two years now, and I use it every day. It works on the same principle as my old stethoscope, except it’s more affordable and I can take photos of everything I see. It’s made up of a light source and a miniature camera which fit through the f-hole and relay images to a computer screen. The images are in colour and I can take stills; it’s also possible to take a video, although that’s not something I do. Every instrument I see has its own file, and the photos are added to it – partly so that I have a permanent record of how it looked at the time, if it ever comes back to my shop after I’ve sold it. I have to be quite careful with how I use the photos, though. I find when you show pictures of the inside to a prospective buyer, it’s like a doctor showing a heart scan to a patient – I have to explain very carefully what can be seen in the image, and if there’s a small blemish inside, for instance, it might cause the customer concern even though it means nothing at all.
The device is quite simple to use, and I suppose that with this kind of technology, where it’s so easy to create good images, there’s a danger that people might try to do their own assessments and valuations, rather than seek the advice of an expert.
Having records like this also makes it easier for me to compare the internal features of different instruments. Sometimes when you see the way in which a lining has been inserted, you can make a connection with something you’ve seen years ago – and if you have a photo, you can check it immediately. Perhaps it’s a style of making, or maybe you’ll be able to identify the individual maker
KEVIN KELLY
www.kellyviolins.com
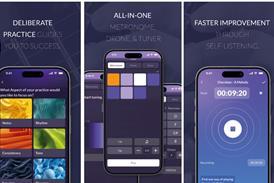
Gadget choice: Google SketchUp free; Apple KeyNote free
About six years ago I started using computer software to draw out my instrument designs. Before that I used a compass and straightedge – and lots of tracing paper. In violin making school we were told how something should look but without an explanation as to why. I knew there was an understanding there that I was lacking, and so I started figuring things out by trying to recreate existing designs. Working out how to do the same kind of thing on a computer, instead of by hand, hugely increased the speed of both learning and creating new designs.
I use SketchUp, a free downloadable 3D-modelling program from Google, mainly to design scrolls and f-holes. First of all, I set it to 2D – I’ve never needed (or been able) to make a 3D model of an instrument.
In principle there’s no difference between designing with a pencil and designing on a computer. In practice it’s easier to make changes and make comparisons on a computer. When it comes to comparing one instrument with another, I use KeyNote – an Apple version of PowerPoint. It’s very easy to put images into it, change sizes, and make one image less opaque, so that you can see the next image underneath it. If you’re trying to deconstruct the design of a head in Google SketchUp, for example, you can export it as an image. It would be possible to copy an existing photo of a Stradivari scroll and make a template, although some people would prefer a more free-form tool such as Adobe Illustrator, which allows you to draw curves more freely.
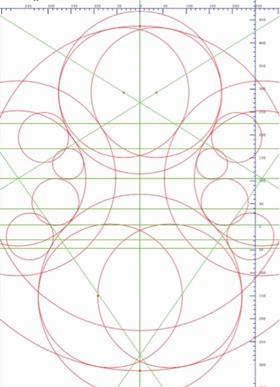
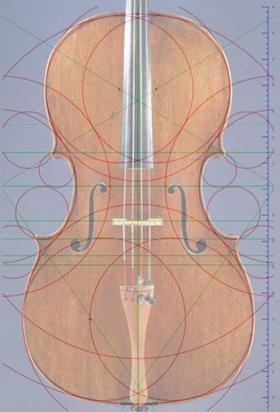
When it comes to bodies, I’ve recently been introduced to a new program developed by Harry Mairson, a US computer science professor and amateur maker. It’s based on François Denis’s 2006 book Traité de Lutherie, and he calls it the ‘Geometry Engine’. I adapted his program to use my ‘four circle’ system, which uses circles drawn in a simple harmonic pattern to form a framework for the design of the body: like a spreadsheet, if you change one of the instrument’s measurements, a number of other values change as well. Most recently I’ve used it to combine two of my favourite making styles: I wanted to make a violin with Brothers Amati C-bouts but Stradivari sides. I found it relatively easy to combine all the various measurements with the end proportions that I wanted, and then just print out the template for the mould. I don’t think it would have been such a simple matter if I had been using a pencil.
JOE ROBSON
www.violinvarnish.com
Gadget choice:Rasparella horsetail $5/piece
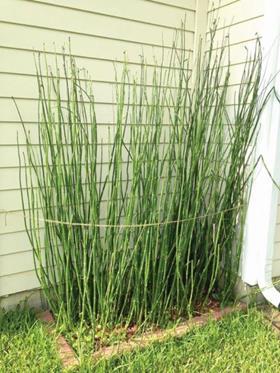

Horsetail, or equisetum, has been used as a finishing tool by violin makers since before Stradivari’s time. It works not so much like sandpaper; it’s more like using a scraper on the white wood, before it comes to varnishing. There are two basic problems with using it: first, it wears out very quickly, and secondly, a lot of the chlorophyll in the plant is transferred to the surface of the instrument, so it always creates issues involving colour. Thirdly, makers have always had to process their own equisetum after purchasing it, which takes up a lot of time.
Dorian Barnes, a violin maker based in Houston, has developed a technique to refine horsetail to make it extremely durable, and to take out all pigment in the plant – chlorophyll and xanthophyll. I’ve found that with one of these small strips of horsetail, I can do all the surface finishing on up to three violins. When it gets softer I can use it for edges, scrolls, and the tighter places around the instrument.
Another of Dorian’s innovations is quite simple: instead of selling the horsetail loose, he’s put it on a backer, a special tape made by the 3M company, which means it’s flexible enough to do the job but stiff enough to hold the equisetum together.
I’ve been using it for about three years and I think it’s fairly popular among violin makers in the US now. It’s become a part of the way I teach wood preparation before the application of varnish, so my students certainly know about it.
JOHN ANIANO
www.jbabows.com
Gadget choice:Alberti disc sander $650
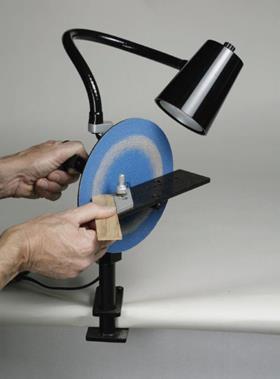
First of all, I don’t own one of these – instead, I made something similar for myself a few years ago using a watchmaking lathe, a countershaft and a Singer sewing machine with a pedal. So it’s basically a foot-powered disc sander, which allows me to have both hands free while using it. But when I’m at the Oberlin bow making workshop, there’s very often a queue of people waiting to have their turn on this Alberti hand-powered disc sander. As I recall, John Alberti designed it for a maker who wanted something useful for small tasks, such as fitting a peg or soundpost, where you need to take away a small amount of material very quickly.
It’s a dynamically balanced piece of equipment, which means it runs effortlessly. It’s also very easy to change the discs (to change the grit, for instance, or to substitute a fibre disc for sharpening tools). You can use pressure-sensitive adhesive to hold the sanding disc to the plate, and when you want to switch the grits quickly, the plate is held in place by rare-earth magnets, so you can pop one disc off and snap the other one on.
The sander is hand-powered, so it’s possible to control its speed in a very precise, tactile way, and it can be a real time-saver. If you want to knock a corner off the heel of a cello bow, say, you can sit at the workbench and carefully remove the material with a knife; but using this disc sander, it would take around 30 seconds. The only thing it doesn’t have is good provision for vacuuming the dust away. If I’m working with ebony, in particular, the dust makes me sneeze.
MASON WEEDMAN
www.givensviolins.com
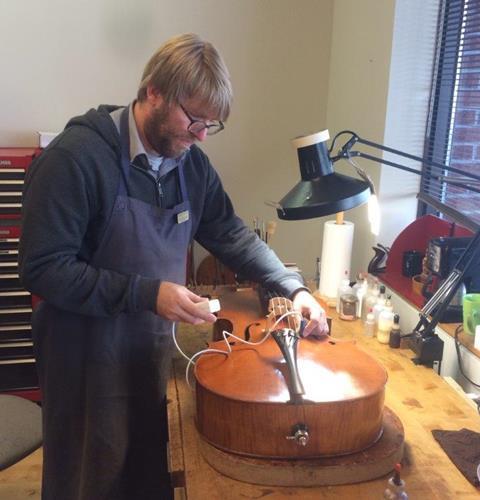
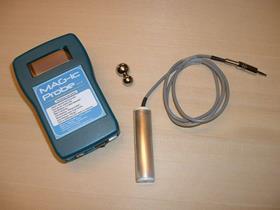
Gadget choice: MAG-ic Probe Thickness Calliper $349, MirrorMe app free
Since I joined the staff at Claire Givens Violins in Minneapolis, one of my duties has been to check the inventory coming into the workshop. Part of this checking process is to examine the thickness of the wood all around the instrument, because if it’s too thick it’ll be more difficult to adjust the sound, and if it’s too thin, there might be greater potential for cracking in the soundpost area. If any of the graduations seem unusual, that’s something I have to make a note of, especially if an instrument has been brought in for purchase consideration.
The MAG-ic Probe was launched in 2013. The principle is quite simple: you put a magnetic ball inside the f-hole and move it around with the gauge, so it can sense the thickness of the wood between gauge and magnet. With our previous gauge, which worked on a similar principle, there was a little room for interpretation, whereas this one is more accurate and recalibrates each time you turn it on. Also, you can now get a Bluetooth version, so you can take a measurement and it appears on your iPhone instead of on its own reader.
Another very simple device I’ve discovered recently, and which I use a lot in my work, is a free downloadable app called the MirrorMe for iPhone. I use a mirror to look inside an instrument’s f-hole, and reflect the image on to my phone screen. Then I take a photo of the reflection, and use the MirrorMe app to turn it the right way up. It wouldn’t be good enough to make a record for posterity, but when it comes to searching round the interior for a maker’s signature, or a restoration mark, it can be invaluable – and it’s very easy to use.
JOHN WADDLE
waddleviolins.com
Gadget choice: Strait-Line Laser Level $30
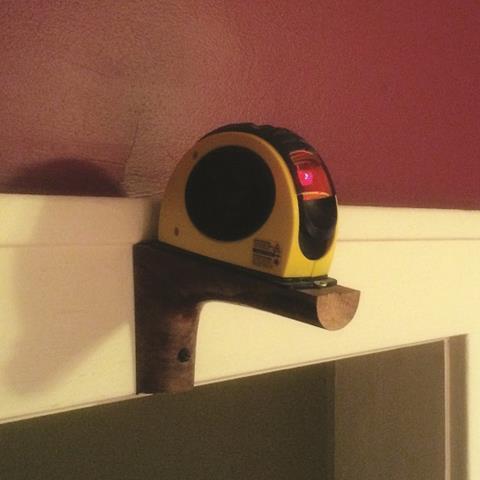
At the hospital where we carry out CT scans on instruments, we always begin by lining the instrument up on the bed using a laser. It projects a beam down the exact centre of the bed, and there are also horizontal laser lines that help with alignment. I realised that it might be useful to have the same thing in my own workshop, and discovered they were available fairly cheaply at hardware stores, so I bought one and mounted it on the wall above the door. I’ve been using it for around ten years and it’s very reliable (batteries need replacing periodically).
Very simply, it’s like a laser pointer that emits a line instead of a point, so I have it angled to cast a permanent line across the centre of my workbench. It means I can always see it when I lay something over it; the line is about 2mm wide, so I could probably get a more accurate line with a straightedge, but it’s extremely handy when it comes to giving things a quick alignment check. I mostly use it in set-up work, checking that the neck and fingerboard are straight, the bridge is in the middle of the instrument, the tailpiece is balanced, the saddle is centred, and that everything lines up with the scroll. I don’t have to worry about how to make a mark on the instrument that’s not permanent, and it’s just quicker than measuring and placing marks all over the place.
This article was originally published in The Strad’s 2016 Accessories supplement.
INTERVIEWS BY CHRISTIAN LLOYD


No comments yet