


Advice on how to fit, adjust and design your bridge from The Strad Archive
Making a good bridge begins with careful observation of the instrument, including the f-holes, bass-bar, arching, top wood, neck and fingerboard. The instrument’s sound and the characteristics and needs of the musician all play a part in every decision regarding the bridge, as do the bow and strings used.
Mathijs A. Heyligers, The Strad, March 2016
The secret is buying the right wood in the first place. It has to have a straight, close grain and the maple should come from a tree that is between five and fifteen metres high and around 200 years old. It is not just the closeness of the annual rings that is important to the sound (ideally running dead straight across the bridge), but also the flecks, or medullary rays, running down the bridge, through which the sound vibrations travel to the resonating table beneath.
There are four qualities of bridge: superior extra choice, which are made of the best-figured, finest wood, that has seasoned for about eight years; superior first choice (well-figured, selected wood seasoned for around three years); selected study choice (figured wood); and study choice (lightly figured wood).
Jane Dorner in conversation with Jean-Louis Despiau, The Strad, August 2003
One major aim should be to make the bridge as light as possible, without it collapsing or distorting. But there are two schools of thought on how to achieve this. One dictates that you excavate as much as possible from under the bridge, making the lower arch high and round, and the ankles rather tall, and concentrate the mass in the higher breast of the bridge. From this comes a brilliant, cutting tone that can compensate for a dull, unresponsive instrument.
The other way has the bottom sweep cut as low as possible, the ankles short and thin, and the centre of gravity of the bridge close to the table. It may sometimes lack the brilliance of the high-cut bridge, but it makes up for that with richness and depth.
John Dilworth, The Strad, September 2013
The correct angle of the bridge is achieved by having the tailpiece side of the bridge standing relatively perpendicular to the table of the violin. The feet of a properly cut bridge are fitted to match the contours of their locations on the belly. As the bridge begins to lean, the downward pressure of the strings will compel the feet to stay in flat contact with the belly, thus causing the bridge to bend. Left unchecked, this will create extreme stress on the waist (middle) of the bridge and may eventually cause the bridge to warp or even break, requiring the costly bridge replacement. In the process of tuning the violin up to pitch, the bridge must be frequently examined and adjusted for its proper angle.
David Gusset, The Strad, December 2014
To produce proper vibration, the centre of the foot of the bridge must be over the bass bar. In many instances the end of the foot only is over the bar, and as the ends are commonly thinned down in fitting, rendering them elastic and non-rigid, there is no real vibration given to the bar from the strings. The position of the bar can easily be ascertained by inserting a piece of card under the sound hole opposite the bridge and marking the distance to the edge of the hole.
C.P.T., The Strad, April 1895
If the f holes are cut in the proper place, the distance between the insides of their upper circles should be the guide for the extreme outside width of the bridge from foot to foot. The exact width of the feet of the bridge should correspond with the width of the bass bar, and the other in a direct line over the sound post, providing the latter be properly placed.
Arthur Broadley, The Strad, July 1897
I had found that the tone of the third string could sometimes be improved by the insertion of an accurately fitted slip of wood under the centre of the bridge, really it made a third foot. I suspect that the addition of a third foot would give us all the advantages of the four feet; that is improvement in tone of the third string. The second string seldom wants improvement as it does not suffer so much from excessive width of bridge as does the third. The reason is that the greater obliquity of the treble side of the bridge tends to equalise the relationship of the E and A strings to the foot. If any one likes to try my suggestion of a slip of wood under the centre of the bridge they must note that the slip of wood must be only a little bit longer than the thickness of the bridge, and must be jammed under only with the precisely right degree of force.
W. Hardman, The Strad, January 1897
When changing your strings, take a sharp pencil and put a little graphite into the string groove for lubrication, both at the bridge and at the nut. After each string-change, check the bridge for straightness by looking at it from the bass side – it is the treble (soundpost) side that is more likely to be distorted. Your bridge is straight if its back is almost at a right angle with the violin’s top on the tailpiece side, and the very top of the bridge is fading slightly towards the fingerboard.
Jerry Pasewicz, The Strad, December 2014
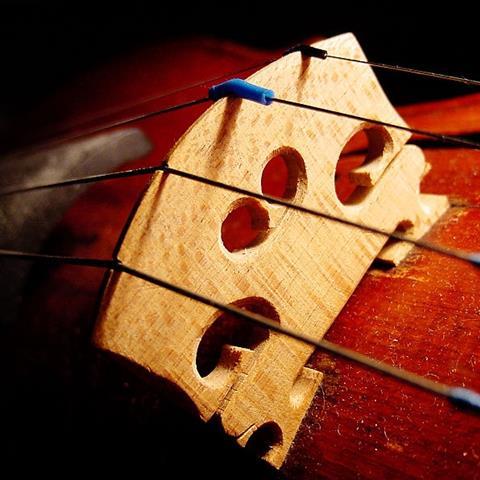
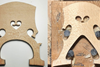
Some early bridge designs have very few openings, therefore leaving too much mass at the top of the bridge immediately under the strings. This restricts the sound, especially of the middle strings. I find that the best bridges have openings under each string, helping to achieve an even sound over the whole compass of the instrument.
Roger Rose, The Strad, April 2009


No comments yet