


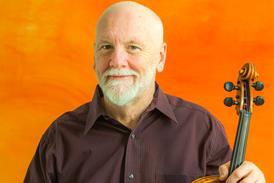


After years of pain Elizabeth Wallfisch finally found comfort by removing her chin rest. She offers a step-by-step guide
It was injury that first made me seek comfort while playing the violin, long before the first glimmers of period performance appeared in my life. Playing the violin was a pain in the neck for me - as well as shoulder and arms. I was gripping too hard for long periods of time without rest stops, and the related injuries resulted in my taking a year off in 1976.
I had been taught with a chin rest placed to the left of the tailpiece and various kinds of inventive shoulder rests, all designed to make playing more comfortable. Many of them do: they encourage facility and speed. However, they also create a reflexive grip between head, chin and shoulder, using many of the complex muscles of the neck, head and shoulder to excess. On reading Six Lessons with Yehudi Menuhin I was introduced to my collar bone and to the idea of using the chin rest as a kind of hook, rather than a platforrn.
This was a time of huge development in early music in Europe. Christopher Hogwood, Trevor Pinnock and the Kuijken brothers were among many others of early music. The tidal wave was in full flow in the UK and I became caught up in it. All my friends in the profession were encouraging me to try it. Then in 1979 a Baroque violin and bow were handed to me with the instructions to play the Bach D minor Partita in two weeks' time.
The Geminiani and Leopold Mozart treatises were already a part of my library, as were the publications of Robert Donnington. So out they came and I started to learn. I taught myself to play without gripping the violin between chin and shoulder, using my left thumb to shift down. Then began the search for mastery, which still continues.
There is also an ethic underpinning the endeavour that is not purely connected with physical comfort and the avoidance of injury. This is directly concerned with the myriad stylistic issues of the 17th and 18th centuries with regard to violin playing and the'Affekt' contained in the music of the periods. The benefits of mastering this technique include flexibility of expression as well as physical freedom.
I have been teaching the following method in The Hague for the last eight years, refining and learning as my students succeeded or failed to grasp the techniques involved. Those that find it most difficult are the best teachers!
The issue of posture is of critical importance. Stance, freedom of bodily movement, hips and knees soft, arms and head free: all of these are paramount. You should feel as if you are swaying gently like a eucalyptus tree in the wind.
Start without your violin, feet apart, right and left feet making a line parallel with the music on the stand. Try not to swing your right foot out to the right or behind the plane of the left. Eyes should face directly to the front, engaging with the music or book, rather than looking over the left hand. The music stand should be high enough to prevent stooping and your shoulders should be parallel with the music.
Still without the violin lift your arms up as if holding a large, heavy book, hands facing upwards. Then let go, making your head and neck soft and loose. There are many other images and tricks to reinforce this stance, which is the basis for all good playing.
To prepare for picking up the violin, take the chin rest off the instrument, as well as any shoulder rests or pads. A bare fiddle is needed for the moment as the familiar old habits will almost certainly get in the way of the new. Without any chin rest or shoulder rest, the accustomed grip becomes hellishly uncomfortable, if not impossible!
The next step is to take the violin in the right hand, strings facing you, the first finger hooked around the bottom-right corner.
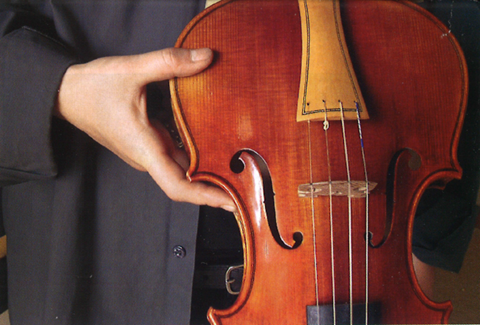
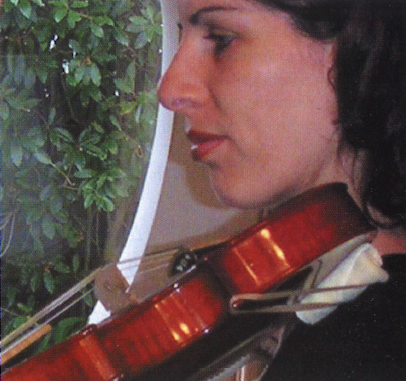
Place the fiddle on your collar bone, with the chin a little to the right of the tailpiece - not, as is conventional in modern playing, to the left - but not touching the violin. The head is completely free. No attempt should be made to put the chin down on the violin.
There now comes a point when individual physique becomes a critical factor in the method. It is important that the violin is not parallel to the floor like a table. The result of this would be that the right arm has to be raised too high and the left arm has to rotate too far under the violin. Danger presents itself posturally, muscularly and tonally if this happens. I recommend making a wedge out of a square of chamois leather held together with rubber bands. This is simple to make and infinitely adjustable to every shape of shoulder.
The aim is to create a gentle inwards slant of the violin where the player's physique lacks the necessary structure. The arms, the hands and the whole physical mechanism should be integrated and comfortable: the shoulder does not need to be raised.
From first lifting the violin up on to the collar bone, move on to the left hand coming up naturally to support the violin in first position with no grip - just a 'being-there'. Then move the hand to rest between third and fourth positions, again easily, with no special involvement of the thumb - a simple 'going-there'. A great deal of repetition is vital in reinforcing these movements and learning these skills. Constantly return to the basic posture, too.
Then comes essential learning for the left thumb. In third position, I ask for the thumb to extend down the neck and back up to third position; up and back, again and again - like a windscreen wiper.
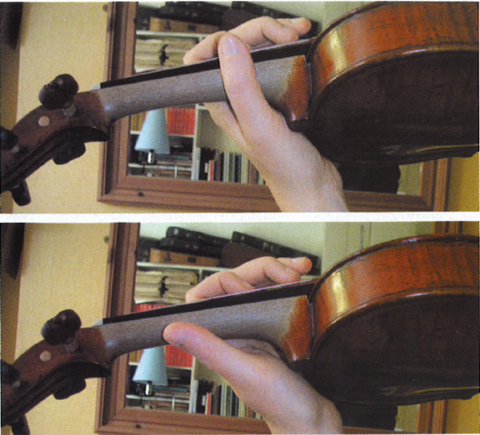
The next step is to introduce yourself to the base joint of the first finger of the left hand . Experiment with balancing the violin solely on the flesh just above the base joint of the first finger, swing the left arm outwards slowly, until the violin is solely balanced on that part of the finger. Roll the arm back towards the body, so that the violin sits comfortably in the crook of the thumb and then go the other way, balancing the instrument on the ball of the thumb. Engaging with the process, go back and forth between the two positions, making friends with the first finger joint. This requires the elbow to swing in and out. Learn how it feels to squeeze the neck of the fiddle gently between the finger and thumb however you like, trying the many different positions of the thumb; back, forward, under the neck or in a neutral position. Find out how it feels. It may help to raise the fiddle a little above the horizontal in this movement.
Then put your thumb back under the neck, gently squeezing the neck between thumb and base finger joint. Raise the fiddle slightly, pushing it softly into your neck, and slide your left hand back approximately to first position, feeling the friction between thumb and base joint of the first finger as you move back. Be calm: take it slowly. Try not to look at your left hand all the time. Shut your eyes and learn the picture of the feeling of the movement through touch rather than sight.
The whole mechanism comes together very suddenly. With the left hand between third and fourth position, the thumb going back and the squeezing of the flesh of the first finger, the whole hand and arm descends to first position without any need to hold the violin with the chin-shoulder combination.
All these details are necessary for the body to understand this as a familiar and friendly technique. Patience is essential, as is repetition and perseverance. It is vitally important to go back repeatedly to the beginning of your 'holding pattern'. Reinforce the positions and techniques. Be prepared to feel pretty strange at first. Remember you are learning something totally new at the same time as unlearning the habits of a lifetime. You will gradually become more and more confident the more you play vigilantly. Don't be in a hurry!
Then the bow goes on the strings and it gets easier, immediately, the bow forming a major support structure. The technique becomes real, accessible and relevant. Open Geminiani's treatise, The Art of Playing on the Violin. Read his wonderful instructions and start referring to the guidelines I have laid out in my treatise.
I also approach trouble-shooting, which includes vibrato, slipping, speed, tone and wobbling, among other things - some or all of which can be worries at first. For vibrato, I suggest that you make a circle between the finger and the thumb, with no other part of the hand touching the neck of the fiddle. Raising the violin slightly and nesting it into the neck is always helpful for stability. An arm or wrist vibrato, or ideally a combination of the two, is easily achieved without gripping with chin or shoulder.
As for slipping and wobbling, both of which hinder facility, the position of the violin is crucial, as is the material you use under the fiddle, Try playing with an open-necked shirt - violins don't slip on skin. The height of the wedge or whatever you choose to use for the angle of the violin is also important. It must be tailored to suit your build so that the tilt of the violin is perfect for you.
When I play music written after the early 19th century I have a small chin rest that sits over the tailpiece as a kind of hook - not a platform - for when I need to put my head down. I also use a larger wedge to lessen the distance my head has to drop. All you need is the skill to be able to lower the head when needed in fast, expressive or tricky passages and to be able to release it again - not to be perpetually in a state of gripping.
All the above may seem specific to a small community of violinists who play in Baroque style. Not so! Once the basics of the movement of the thumb in relation to the base joint of the left hand and the unlearning of the vicelike grip we all recognise as part of violin playing are in place, this technique is totally relevant to everyone.
This article was first published in The Strad's September 2004 issue.


No comments yet