


Dr Rebecca McLeod, associate professor of music education at the University of North Carolina, gives a guide to achieving a good vibrato - from establishing a relaxed position to mastering a smooth, even motion
1.Establish and reinforce proper instrument position from the first lesson. A proper shoulder position is one where the instrument is supported on the collarbone, is relatively parallel to the floor, and the end button is slightly to the left of the hollow of the student’s throat. The player should be able to support the instrument without the help of the left hand for short periods of time. All of the joints from the shoulder to the fingertip should be flexible. Each student is different, so adaptations may be required to find the correct position for each individual.
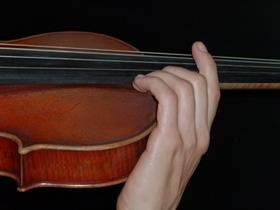
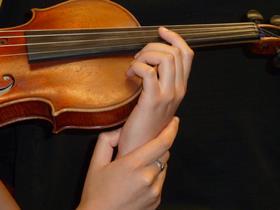
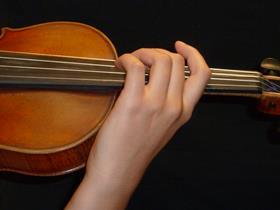
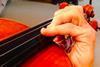
2.The left hand must be balanced and free of tension. There are generally three points of contact or 'touch points' that establish the left hand frame. The base knuckle joint of the index finger on the left hand is generally the first point of contact. Differences in hand size may dictate a touch point that is slightly higher or lower than the base knuckle joint depending on the individual. The ultimate goal is for the left hand fingers to create a box shape that later will allow the first knuckle joint to flex. The second touch point is the pad of the finger. The third touch point is the thumb. Recommendations of teachers and performers regarding the location of the thumb vary. The most important element is that the thumb is loose through the joints into the wrist.
3.Begin pre-vibrato activities during the first year of instruction. Pre-vibrato activities may commence while the left hand frame is being developed. Promote flexibility by presenting exercises away from the instrument. The first knuckle joint of each finger must be flexible in order for the student to vibrate. Have the student create a circle with their index finger and thumb, and ask the student to practise straightening and bending the first knuckle joint. This exercise should be repeated with each finger.
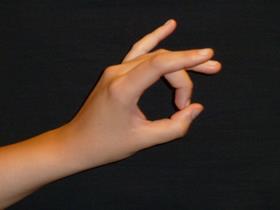
Straightening and bending the first knuckle joint
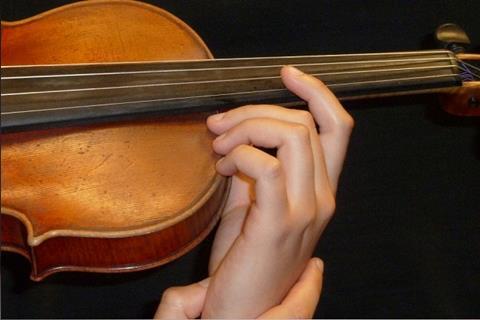
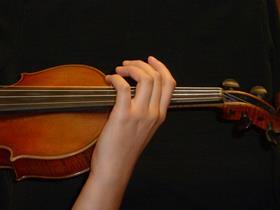
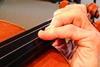
4. Transfer the flexible knuckles to the instrument. The violin fingerboard provides an excellent physical guide for students to practice a flexible first knuckle joint prior to vibrating on the string. Align the student’s left hand on the body of the instrument so that the finger being practised is lightly touching the neck and the fingernail is facing the bridge. The violin fingerboard prevents the student’s hand from twisting and guides the finger forward and back.
Boxed finger joint

Extended finger joint
Manual assistance
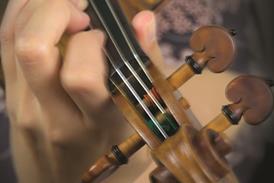
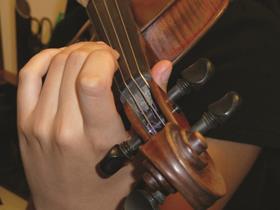
5. Disengage the base knuckle of the index finger. The base joint of the index finger should be released from the side of the instrument prior to vibrating for two reasons: (1) Disengaging the index finger allows for a small space to exist between the index finger and the neck of the instrument so that the hand can 'wave'. (2) Opening the thumb joint of the hand frees the hand of tension so that it can 'wave' smoothly.
Base knuckle joint released from neck
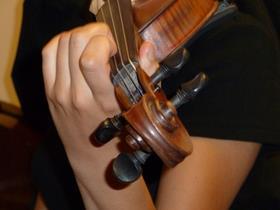
Base knuckle joint touching neck
6. Promote both a forward and backward motion. Although research shows that the pitch of violin vibrato is not exclusively from the pitch and below, exercises that promote this motion are very effective when teaching vibrato and should be included in the curriculum. Many notated exercises illustrate an oscillation that originates from the intended pitch to a half step below. Exercises such as these are important as they promote flexibility in the first knuckle joint. Pairing this flattening exercise with a forward motion, allows the student to combine both aspects of the vibrato motion. Tapping exercises that encourage the left hand to propel forward using a swinging motion from the wrist are also helpful.
Tapping exercises
7. Combine the forward and backward motion into one motion. Have students 'polish their strings'. With the thumb in the heel of the neck, place the second finger directly over the thumb without any weight in the string and have the students swing their hand from the wrist so that their second finger moves back and forth around the location of the thumb. Students should begin with a wide motion that gets smaller until they are simulating a vibrato motion. Repeat this activity with all four fingers.
Polish the strings
8. Simulate the bowing motion in the air while vibrating. Combining the left and right hand motions can be initially awkward for students because the hands are performing two very different motions. Left hand and right hand independence are important; specifically the player must be able to execute a smooth bow arm while vibrating the left hand. Air bowing vertically while vibrating with the left hand prior to performing with the hands together can improve coordination. Partner activities, where one student vibrates the left hand while another student bows, can be both fun and helpful.
9. Practice the vibrato motion with a metronome. Correct repetition with the use of a metronome helps establish an even vibrato at an appropriate rate. Vibrate from the pitch and below using eighth notes grouped in 2, followed by triplets, sixteenth notes, and finally a natural vibrato motion. Careful practice that establishes a smooth and even vibrato eventually will allow the player to vibrate expressively with control over the speed and width.
Violinist Lihay Bendayan: Fourth finger vibrato
- 1
- 2
- 3
- 4
- 5
- 6
- 7
- 8
 Currently reading
Nine steps to mastering violin vibrato
- 9
- 10
- 11
- 12


No comments yet