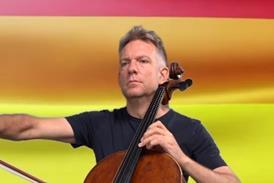


Rachael Ridge gives some helpful pointers and a step-by-step guide delving into the nitty-gritty of left-hand set-up
Explore more Technique articles like this in The Strad Playing Hub
How do you set up the left hand properly to play the violin? While I believe it should be fairly intuitive, there are some foundational aspects that you need to know in order to be successful. I’m going to go over the components of the left hand, the role they play, and how they function together as a whole. I’ll then walk you through step-by-step how to actually set your hand up on the violin.
The components of the left-hand set-up include your wrist and fingers, but also your arm, elbow and shoulder. They all work together to create a solid foundation.
The Shoulder
It’s really important that your shoulder stays in its natural alignment. Your chest should be open, shoulder blades spaced and open on your back, and your muscles relaxed. Proper alignment is important for stability as well as to maintain your full range of motion. It also creates a level foundation for your instrument. When the shoulder joint is stable and everything is in alignment, the violin is able to rest on the natural plane created from the shoulder to the collarbone. However, many violinists struggle with the shoulder creeping up towards the ear as it tries to help hold the violin in place. This causes tension and misalignment in the body. One way to feel this for yourself is to practise holding the violin without a shoulder rest and make sure you know where the violin should naturally sit. Then, if you decide to use a shoulder rest going forward, you now have a better understanding of the foundation from which everything stems.
The shoulder joint also allows the fingers to move across the instrument from string to string without losing the shape of the left hand. This is accomplished by the elbow swinging under the instrument. This isn’t a very big motion, but it is very important to be aware of this function of the shoulder. If the movement is over-exaggerated, the fingers will be pushed too high up on the fingerboard (or pulled off!). You may feel like your fingers are cramped and hard to coordinate, or you may feel like it’s hard to reach the lower strings. However, if the shoulder doesn’t move enough, you will be forced to try and reach for the notes (especially on the lower strings) breaking your left hand shape and causing intonation issues.
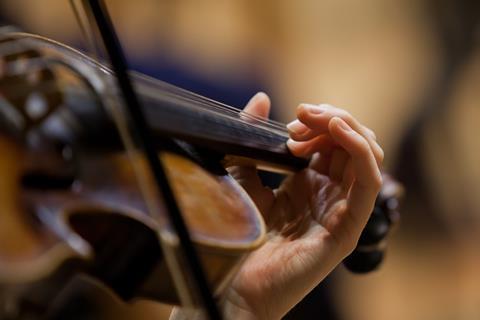
Fingers and Wrist
Your wrist should turn in slightly towards the neck of the violin allowing all four fingers to hover over the strings simultaneously. Your thumb should be resting against the left side of the neck and will be providing counter pressure for your left hand fingers. But, we want to avoid clenching or gripping. Sometimes I will see students pressing in towards the neck with the tip of the thumb, but that will most likely lead to gripping the neck too tightly. I like to have it resting with the side of my thumb against the neck so that it’s as relaxed as possible, providing just enough counter pressure to press the string down.
The fingers will then be placed tall on their tips. We don’t want to use the fleshy part of our finger because that can cause too much pitch fluctuation as the notes on the violin are very close together. If you look at your fingers after you’ve been playing, you will see an indentation from the string. If your finger is placed on the tip, the indentation should be fairly close to the nail. The fingers should be creating a nice rounded shape with every knuckle bent and gently curved.
Listen: The Strad Podcast #103: adult learner mindset with violinist Rachael Ridge
Read: The anatomy and function of the bow arm: violinist Rachael Ridge
Now let’s walk through how to set your left hand up on the violin step-by-step.
1. Place the violin on your left shoulder/collarbone. Make sure it is stable.
2. Bring your hand up to the neck of the instrument. Your thumb should be resting against the side of the neck and lined up across from your first finger.
3. The neck of the violin should hit at the base of your first finger.
4. Curl your fingers and place them on the A string starting with your first finger. Each finger should be placed at the tip keeping a curled, flexible, stable shape.
And that’s the nitty gritty behind the left-hand set-up on the violin! Remember that everything should feel relaxed and flexible yet stable. We want our foundation to be strong while allowing for flexibility and range of motion. For more violin tips and education, follow me on Instagram @rachael.ridge or on Facebook in The Adult Violin Academy Facebook group.
Read: The dark side of being an adult violin beginner: Rachael Ridge
Read: 10 tips on how to stay motivated as an adult beginner violin student
Read more Technique articles like this in The Strad Playing Hub
The number one source for playing and teaching books, guides, CDs, calendars and back issues of the magazine.

In The Best of Technique you’ll discover the top playing tips of the world’s leading string players and teachers. It’s packed full of exercises for students, plus examples from the standard repertoire to show you how to integrate the technique into your playing.
The Strad’s Masterclass series brings together the finest string players with some of the greatest string works ever written. Always one of our most popular sections, Masterclass has been an invaluable aid to aspiring soloists, chamber musicians and string teachers since the 1990s.

American collector David L. Fulton amassed one of the 20th century’s finest collections of stringed instruments. This year’s calendar pays tribute to some of these priceless treasures, including Yehudi Menuhin’s celebrated ‘Lord Wilton’ Guarneri, the Carlo Bergonzi once played by Fritz Kreisler, and four instruments by Antonio Stradivari.


No comments yet