


A method for sending instruments long distances, giving the smallest possibility of damage to the package’s contents
By Philip Ihle and Victoria Farrell-Reed
Ihle Violins, London, UK
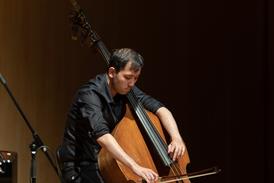
One of the joys of lutherie is witnessing the moment when bow meets string, and life is ignited into the instrument. Unfortunately this is another small pleasure the Covid pandemic has eliminated, as instruments can no longer be delivered to musicians in person, and one must instead find alternative routes. In addition to this, as businesses expand and reputations become known, it is more important than ever for makers and musicians to be able to send instruments globally.
It can be a nail-biting affair, waiting to open that box and see how much of the violin is left after its perilous journey! The three main risks concerning shipping are: varnish damage; pegs slipping, which means the finely tuned set-up is lost; and sleepless nights for both the senders and the receivers.
The below method of packaging and shipping instruments uses a shipment to America as an example. At the end is a checklist of documentation required for luthiers based in the UK to ship their products abroad.
1. When shipping a violin to a player, it needs to arrive in perfect, playable condition. It has been common practice in the industry to ship instruments without set-up, but of course, but that is only an option when shipping to a violin maker.
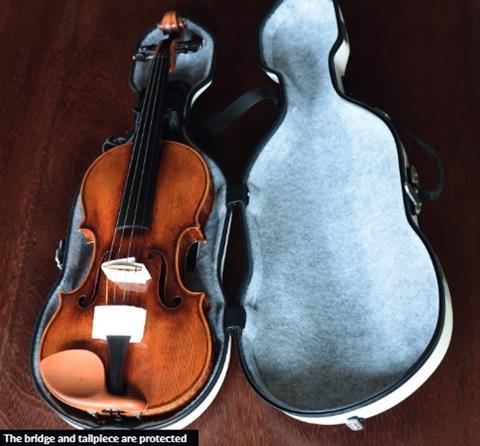
To prevent the pegs from slipping, I tune the strings down just a little, and make sure the pegs are on the tight side. The colder and drier the conditions, the greater the risk. I also wrap soft kitchen roll around the wide end of the tailpiece and sometimes the bridge, so that the varnish will not be damaged in the unlikely event the bridge falls. It may also be worth wrapping the fingerboard in several layers of kitchen roll for the same reason.
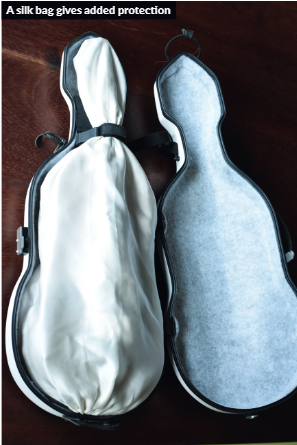
2. Always check the weather. If shipping an instrument to a cold climate, a silk bag will help to give some extra warmth. If it’s going to somewhere warm, wait until the temperature there is below 30C. Last summer I wanted to ship a violin to Las Vegas but the temperature reached daily highs of over 37C for weeks on end, and I postponed the delivery by two months. There’s always a chance that the violin will be left in a sweltering warehouse, risking the varnish melting. Imprints of the case in the varnish surface are probably the most common damage during transit. A suspension case and lining areas of contact with baking paper helps to reduce that risk further.
For shipping to a very dry climate, using a Dampit – a small, worm-shaped humidifier inserted into the f-hole – will keep the humidity above 40 per cent for three days.
I never ship over a weekend, and choose overnight delivery whenever I can, so the instrument is with the courier service for as little time as possible.
3. I often use flight cases, as they not only take up less room, keeping the shipping costs down, but they are also extra protective and light. The Trinity Violin case seals best; the BAM flight case is also very good and strong. A good budget option is the Short, extra-light violin case made of high-density foam which I ordered from the Petz Vienna Shop. BAM also produces a flight case for cello which covers the cello’s normal case to add another layer of protection, although this will also significantly increase the weight.
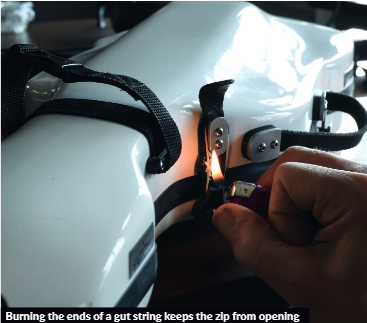
Earlier this year, I received a violin back from a client and found that he had tied the zips together with a piece of wire. I now use a piece of gut string for this, and burn the ends to make sure it won’t come loose.
4. When planning the size of the box, I measure the case and allow at least 3cm extra all round. That crumple zone will absorb most of the shock in case of a sudden impact. When using a violin flight case, I have found the ideal box dimensions to be: 72 x 32 x 22cm, and when using a normal case 86 x 32 x 22cm.
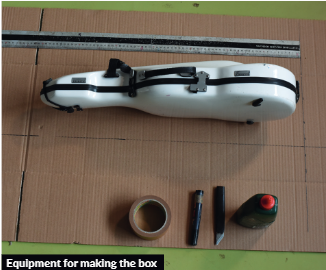
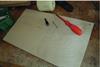
If you ordered a new case yourself, obviously the simplest solution is to keep the box it came in. Otherwise, to build your own box for shipping a flight case, you will need:
• an oversized double-walled cardboard box
• PVA glue
• a sharp knife or scissors
• a heavy ruler
• duct tape
• a felt-tip pen

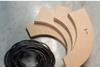
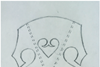
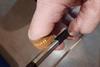
5. In this instance I had a box that was too long and too tall, but the correct width. I shortened it, deepened the slots for the lids to the desired height of 22cm, and cut back the width of the lids to the internal width of the box. Make sure you allow for the thickness of the cardboard (6mm) when cutting.
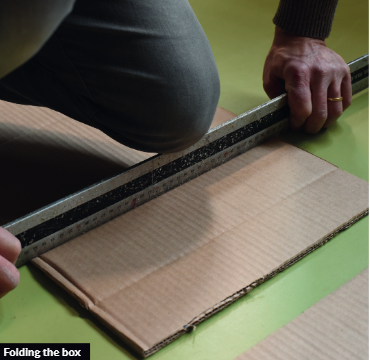
6. Using the ruler, I compress the cardboard to create fold lines. This will make all the difference for achieving a neat box!
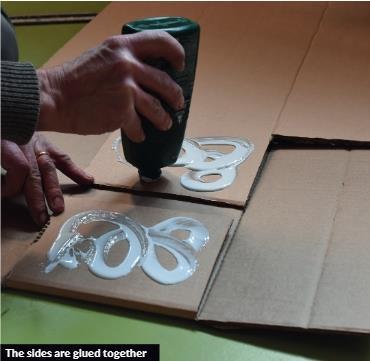
7. I use adhesive to join the parts overlapping the short sides of the box. Any craft or wood glue will do. I then leave the glue to set, using a weight to hold it in place. This usually takes around an hour.
Once the glue has set, I close the bottom lids and seal them with duct tape.
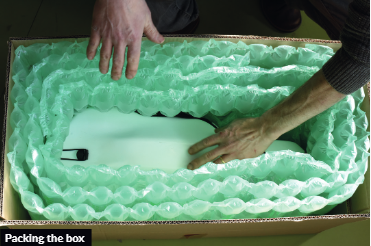
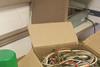
8. I use biodegradable air cushions to protect the case, although most recycled packing material will do, as long as it holds the case gently in the middle of the box to ensure the 3cm buffer zone is maintained. I believe that a neat and light box is less likely to end up on the bottom of the pile during transit. The final weight of this package was 2.7kg.
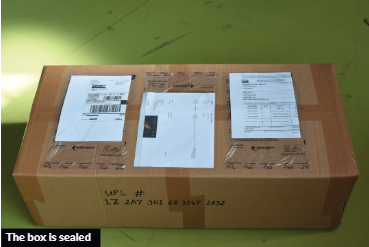
9. The last step is to seal the box on all sides, and attach the shipping labels and accompanying documents (see box).
It may seem obvious, but when attaching the labels to the box it is important to make all pieces of information as clear and visible as possible. From my experience, customs officers will not go out of their way to look for documentation. I therefore place the shipping labels, invoices and Lacey Act forms clearly in separate pouches on the box. A UPS driver once advised me to write the waybill (or tracking) number on the side of the box as well!
Checklist
Here is a checklist to make sure you have the documentation you need before you ship. Please be aware that this information is directly related to importing and exporting to and from the UK, and will be different for each country. Also note that courier services such as UPS will act as customs intermediaries and will be able to complete customs processes for you.
To import or export an instrument, you will need to complete:
-
A customs declaration form. These can be found on the Royal Mail website if not completed by your courier service. If the goods are above the value of £270 you will need form CN23. If below this, you will need either form CN22A or CN22B
-
Three copies of the invoice for the instrument
-
Transportation documents such as a Bill of Lading or Waybill
-
A valuation statement, if goods are worth over £6,500
-
A Single Administrative Document (SAD), also called Form C88 in the UK, with which you can declare imports to customs
-
When exporting you must make declarations to HMRC through the National Export System (NES). You will need to register for the NES and apply for CHIEF badges (Customs Handling of Imports and Exports Freight) as part of the application process.
-
You will then need to complete a transit declaration on the New Computerised Transit System (NCTS)
-
You will also need an EORI number (Economic Operators Registration and Identification) if you want to move goods from Great Britain to other countries (including Northern Ireland). The application can take up to a week to process. (Delays due to lost invoices, missing Lacey Act forms and EORI number enquiries are noticeably more frequent when shipping high-value instruments.)
-
For these documents, it may be helpful to know that the Commodity Code for importing violins is 9202101000 and the Export Code is 92021010. For other stringed instruments played with a bow, the Commodity Code is 9202109000 and the Export Code is 92021090.
-
This article was published in the June 2021 Bomsori issue
The Korean violinist on graduating from the competition circuit to become an international soloist - and why singing is at the heart of her playing. Explore all the articles in this issue . Explore all the articles in this issue
More from this issue…
- Korean violinist Bomsori
- The Knopf bow making dynasty
- Violinist Joseph White’s 1875 New York debut
- Sitkovetsky Trio on recording Ravel
- Master copyist Vincenzo Postiglione
- London-based string group the 12 Ensemble
Read more lutherie content here
-


No comments yet