


Strad readers submit their problems and queries about string playing, teaching or making to a panel of experts
In the next of the series, a cellist asks what he can do during his practice regime to avoid a sore thumb when playing in thumb position.
Do you have a burning question about string playing, teaching or making that you need answering by people who really know? Email us at thestrad@thestrad.com
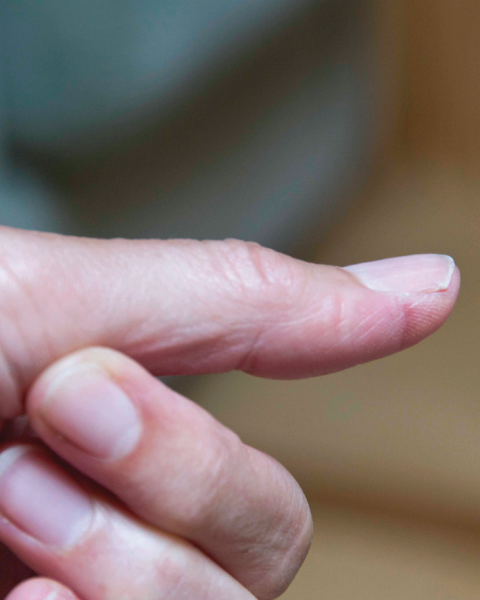
The dilemma I am a 15-year-old cellist and I have just started learning thumb position, but it hurts! Can you give me any tips to prevent me from getting such a sore thumb?
ARND BARTELS, ROTTERDAM, THE NETHERLANDS
ANGELA EAST I imagine that many teachers would be very happy to have a pupil like you, who obviously practises quite hard! First of all, I would check that the strings are the right height from the fingerboard. If they are too high you will need to apply undue pressure to hold the thumb down. A luthier will be able to cut down the bridge for you, or fit a new one if need be.
At the age of 15 you will be intellectually capable of understanding where the notes are and reading the music. This might tempt you into working too fast. You should take the steps into thumb position very slowly, working up to it over several weeks. In the first week you should just find the harmonics with the thumb and then press the string slowly and carefully, to see if you can press it down and keep those notes in tune, just for a minute or so at a time. Try it on different notes if you like. Keep your hand in a fist so your thumb and forefinger look like a snail’s shell. This will help to apply pressure without much effort.
In the second week you can gradually unfurl the shell, which will allow you to play a one-octave scale. In the third week you could practise on different strings, and in the fourth you could try some simple shifts. In the fifth week, practise the move from the neck positions into the thumb position, as in, say, a scale of D major, third octave. There are many aspects to playing in thumb position over and above this example; it is just a question of taking it slowly. You need to practise these techniques in advance of being given a piece with thumb position to learn.
By learning gradually, the thumb should not develop a blister straight away. If you already have a blister, use a piece of sticking plaster while practising, but remove it afterwards to allow the skin to harden. Keep your hands out of water as much as possible and certainly don’t suck it if it is sore!
MELISSA SOLOMON DE FREITAS Developing a thumb callus with less pain starts with excellent arm balance and the correct placement of your thumb across the strings. First make a loose fist. Set the side of your thumb on the A and D harmonics; line up the A string just above the middle of your thumb joint and the D string around the middle of your thumbnail. While keeping your arm in a straight line from your elbow to your knuckles, slightly tilt your arm as if you’re wearing a wristwatch and you’re trying to sneak a peek at the time. Anchor your thumb by feeling the weight of your arm resting on or ‘pouring’ on to your thumb. Pressing only with your thumb can make it hurt even more.
Here are some tips for managing sensitive skin pain:
*Put a layer of New-Skin liquid bandage (or even apply super glue) on your thumb to create a tough protective layer
*If your thumb gets a blister, stick on some moleskin tape to form an extra protective layer, so you can continue practising your thumb-position exercises with good form
*Soak your thumb in rubbing alcohol after practising. The skin will dry out and harden sooner, adding to your callus
Rotating through a few practice tasks every few minutes helps improve your thumb-position skills without causing too much pain. For example: practise a thumb-position exercise for a few minutes. Then work on another task, such as a tricky shifting passage, then perhaps a challenging bowing spot, for a few minutes each. This will give your thumb a rest between tasks, improve other aspects of playing, and ensure you’re doing focused work to develop the thumb position and callus.
WILLIAM BRUCE Do you remember when you first started playing the cello? For many beginners it takes a while to toughen up the ends of the fingers on our cheesewire strings, and the thumb is no different. Even after all these years, when I come back from holiday I need to get my fingers and thumb back into condition to avoid soreness. And spare a thought for harpists: after a break, their fingers can actually bleed as they rebuild their calluses! They use a variety of tricks to toughen the skin, including rubbing in lemon juice, methylated spirits or papaya ointment.
It is also worth checking that the cello set-up is correct and your strings are not too high on the fingerboard at the halfway point. Your teacher will be able to advise you on that.
A common cause of a sore thumb can be an incorrectly set-up hand and arm position. Remember to drop the left shoulder, bring the wrist forward a little, balance the hand with the thumb placed lightly over two strings avoiding string contact with the nail, and use light arm weight, not pressure. Take care not to anchor the thumb too heavily – keep everything light and airy.
To condition your thumb, try rubbing it lightly up and down the string whenever you pass by your cello. If you feel soreness when practising thumb position then stop, and leave it until the next day. ‘No gain without pain’ is one of the worst sayings for string players! Finally, for a gently graded approach to thumb position try Thumbs of Steel, the second book in Rick Mooney’s Thumb Position for Cello series.
Angela East is a British cellist and a Level 5 Suzuki tutor and teacher-trainer: www.angelaeast.co.uk
Melissa Solomon de Freitas teaches the cello at her private studio in Pasadena, CA, and at workshops around the US
William Bruce is a cellist with English National Opera and head of strings at Junior Guildhall, a specialist youth arm of the Guildhall School of Music & Drama, UK: bit.ly/1DuORss
Ask the Experts: how to help a student with a short fourth finger


No comments yet