


Advice from professional makers from The Strad Archive
When making an instrument, I consider the rib structure and its shape as the foundation that defines the final outcome. Small increases in measurements and deviation from the intended shape of curves over the course of construction will accumulate to create an awkward look. First, I place the viola rib mould on the reverse side of the cutting board that I use for shaping the blocks. Next, I drill two holes of 3mm diameter through the mould and cutting board on the centre line, in the position indicated by the pins. This will allow easy location of the mould over the outline drawn on the cutting board when constructing the ribs.
Peter Goodfellow, The Strad, May 2009
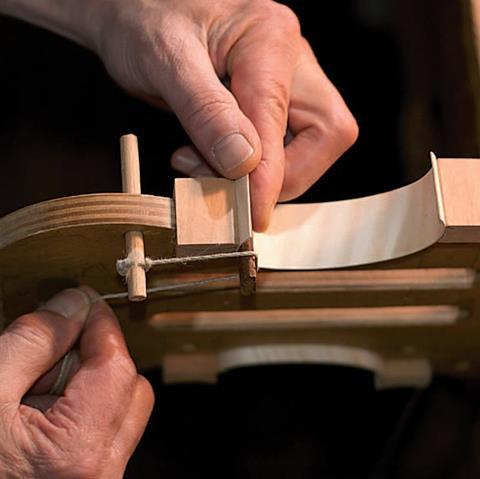
This traditional method of lashing the ribs to blocks has many advantages over the use of heavier clamps, among them its relative ease, control and efficiency, especially when you are working alone. One hand controls the bent rib and caul (a piece of shaped wood that holds the rib flush with the block), while the other hand does the tightening winding. Positional adjustments can be made simply by wiggling the caul, realigning the rib to the block and further tightening using the excess string. Each block requires one piece of string twice as long as an arm, a caul that conforms to the block and an 8mm hardwood dowel or post. I use string from a hobby shop, intended for use as rigging on model ships.
Francis Kuttner, The Strad, November 2009
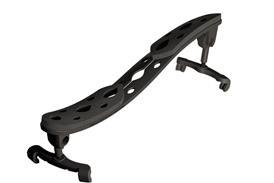
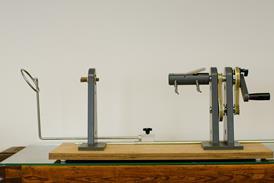
With my technique, positioning the inside mould in a vertical position is imperative. I use a Jorgensen clamp to hold the mould 'on edge' and so that I can flip it over to glue the other side when ready. Another way to do this is to clamp one end of the mould in a side-mounted bench vice at the edge of a workbench. But using a Jorgensen clamp makes this system portable so that I can work wherever it is convenient - for example, where the glue pot that holds and heats my jar of glue is located.
William Scott, The Strad, April 2007
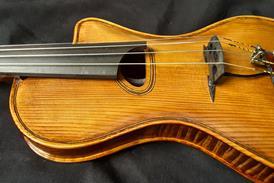
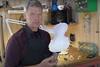
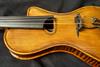
The cornerless model lends itself to greater width across the C-bouts, giving an inherently darker sound:
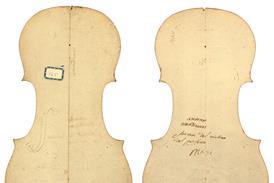
When the back is finished, I score a line 2mm in from the edge on the inside to mark the overhang, and then a further line about 3.3mm from the edge in the top- and bottom-block areas. I round over the inside edge of the back at this stage. The arched and thicknesses back needs support so that it remains flat while the ribs are built on to it. I do this by making a jig from 11mm birch plywood, cut out to the shape of the back. I finish the blocks before gluing them to the back, leaving some extra wood in the height. I cut the external profiles to fit against the line that was scribed earlier 3.3mm in from the edge, then finish the internal profiles.
- Watch: Amateur luthier's decade-long project to make violins for his 10 grandchildren
- Read: Digital Amati: project luthier
- Read: Postcard from the inaugural Australian Luthier & Archetier Congress
Helen Michetschläger, The Strad, October 2007
Before bending and gliding the ribs I smear dry soap liberally over the area of the mould next to all the blocks, to avoid inadvertently gluing the ribs to the mould when any excess glue is squeezed out from the joint between the rib and the block. I bend the ribs using an iron that is so hot that a drop of water will boil and bounce off the surface, then I dip the rib stock in water and bend them using a strap for support. I find the longer I work on the iron the harder it gets - the wood dries out and becomes more prone to breaking, burning or kinking on the flame, so ideally I get the shape right in the first couple of tries. Before gluing I raise the mould by around 1mm so that there's some 'spare' rib material above and below the block in case it twists while being fitted snugly to the mould. When gluing the ribs to the blocks I use an extra thick batch of hide glue to prevent the glue penetrating through the end-grain or flame and staining the outer surface.
Neil Értz, The Strad, June 2006
If an instrument's ribs are too thin, or have many cracks, the traditional repair is to 'double' the rib: to fit a maple veneer inside the old rib to reinforce it. I have made several modifications to the traditional process which I believe give a better result:
*Counter forms are used to support the old rib while a reinforcing veneer is pressed and glued into the inside. Traditionally theses are made of wood, hand-fitted to the outside of the rib, but this is laborious and ultimately not very accurate; undulations tend to get pressed out, giving the repairs rib an unnaturally flat look. I cast the counter forms from plaster, a much quicker process which preserves all of the detail of the original rib.
*The veneer is usually pressed into place using a second, internal, wooden counter form and many steel G-clamps. Instead I use a vacuum bag, as favoured in modern furniture veneering. It requires less set-up time and gives greater and more even pressure on the laminates.
*I use fish glue, a natural protein glue that has the strength and conservative properties of hot hide glue but is liquid at room temperature and hence has a longer working time.
*Adding a layer of silk between the two maple layers significantly strengthens the laminate, allowing the rib to be thinner and more flexible.
Andrew Caruthers, The Strad, May 2016


2 Readers' comments